


Crocheting a magic circle, also known as a magic ring, is a valuable technique that allows you to create a seamless and closed center for your crochet projects. While it sounds mysterious, our essential guide shows you there is no mystery in how to master this unique stitch.
Whether you are a beginner or an experienced crocheter, the magic circle is essential to achieve a polished and professional look in your handmade designs.
In this guide, we will walk you through the step-by-step process of creating a magic circle, so you can confidently incorporate this technique into your crochet repertoire.
Let’s dive in and unlock the secrets of the magic circle crochet!

Since you will probably only need to make one of these for any given pattern, my advice to you, if you are new to this technique is to practice how to crochet a magic circle over and over again until you remember how to do it. Otherwise, you will have to reference a guide every time you need it which takes a lot of time when you are eager to start a project.
What is a Magic Circle in Crochet?
A magic circle, also known as a magic ring or magic loop, is a crochet technique used to create a seamless and closed center for crochet projects. It eliminates the visible hole that is typically present in the center of a traditional crocheted circle.
By pulling the yarn tightly, the magic circle allows for a professional look in handmade designs and a seamless starting point for crochet projects.
The traditional way of crocheting a circle calls for making a bunch of chain stitches, joining the chain with a slip stitch and then crocheting into each chain stitch.
This works just fine and is a straightforward technique and a good next step for someone who just learned how to make single crochet stitches (sc).
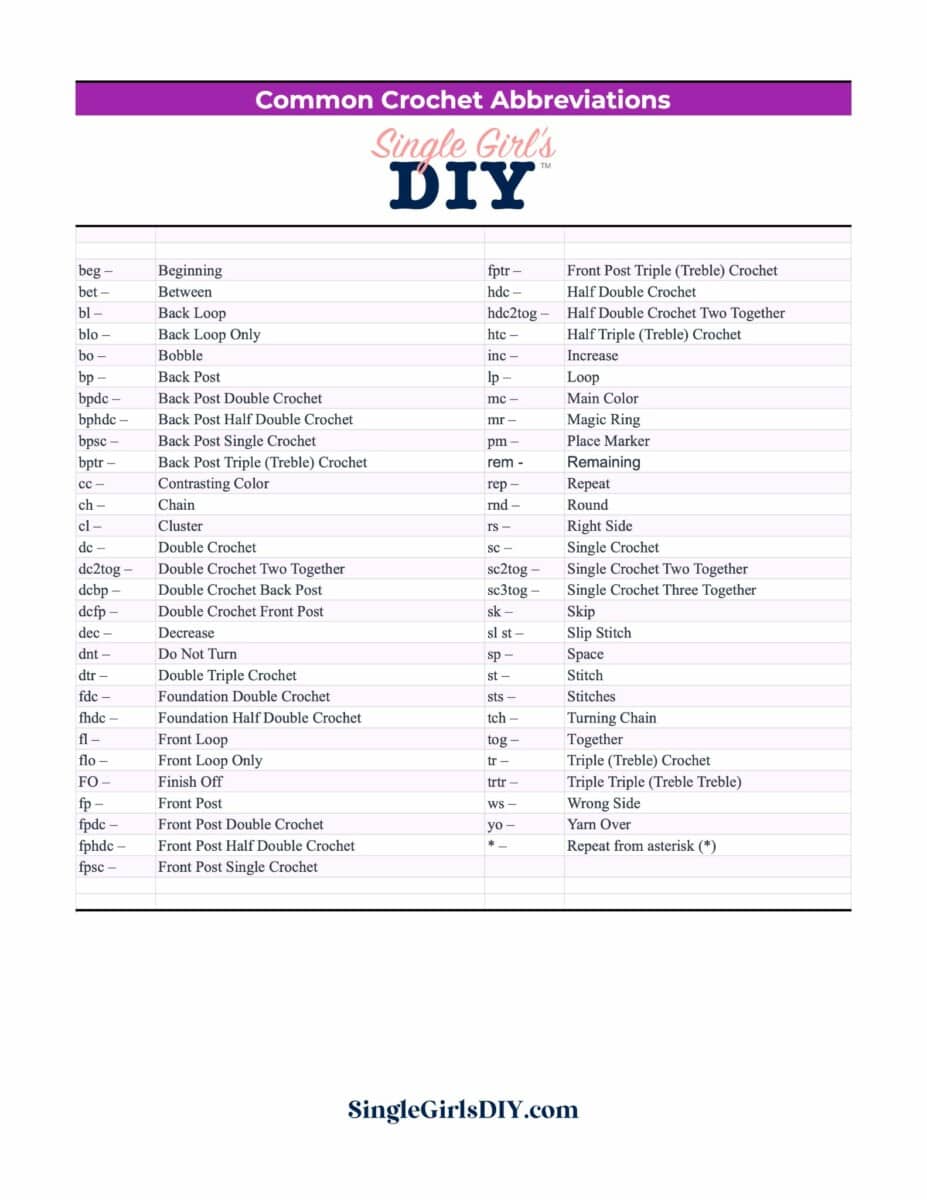
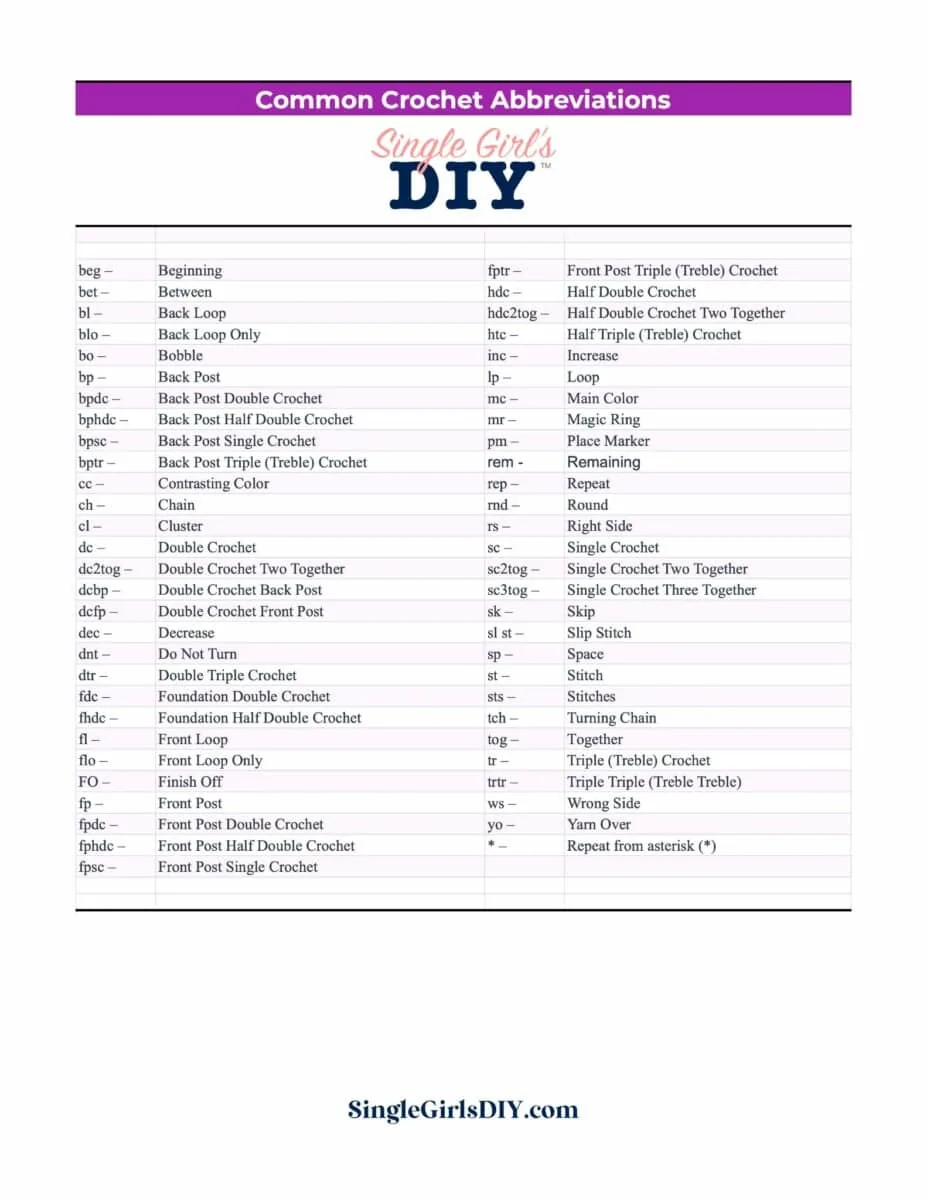
Free Crochet Abbreviations Chart
Get a free printable chart of all the crochet abbreviations you need to know when working on patterns.
The free download is in our pattern library.
The disadvantage of making your beginner circle this way is that you end up with a visible hole in the middle. There is no way to pull it tight enough to disappear.
The biggest advantage of using the magic ring method is that the circle can be pulled tight enough that there is virtually no hole visible in the middle.
See our list of essential crochet supplies you actually need! And nothing you don’t!
How to Make a Magic Circle: Step by Step Tutorial
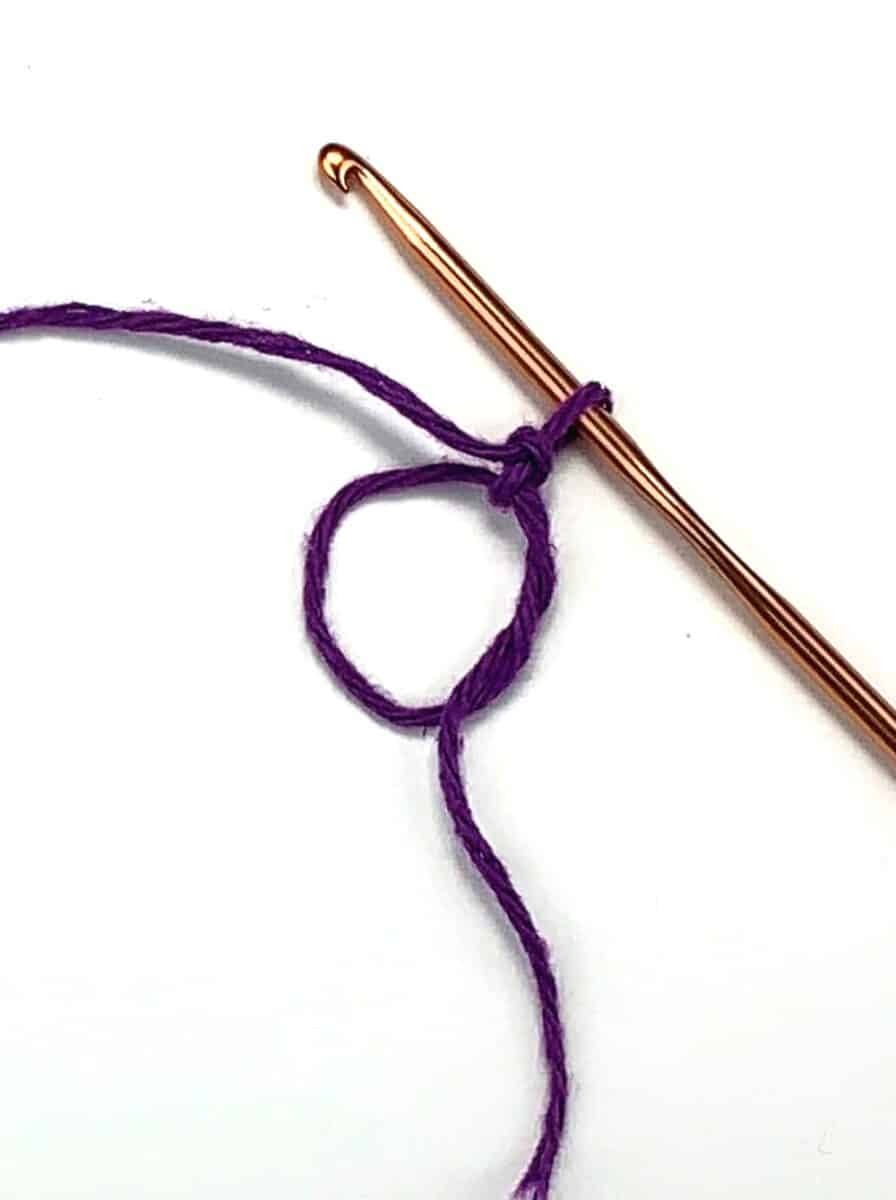
1. Make a Loop or Circle
To begin your magic ring or circle, you must first create the initial loop. This loop is what you will then work your beginning single stitches into.
Place the Yarn in Your Hand
If you are right handed, you will place the yarn on the inside of your left hand, cut end pointing down.
If you are left handed, place the yarn in your right hand, cut end down.

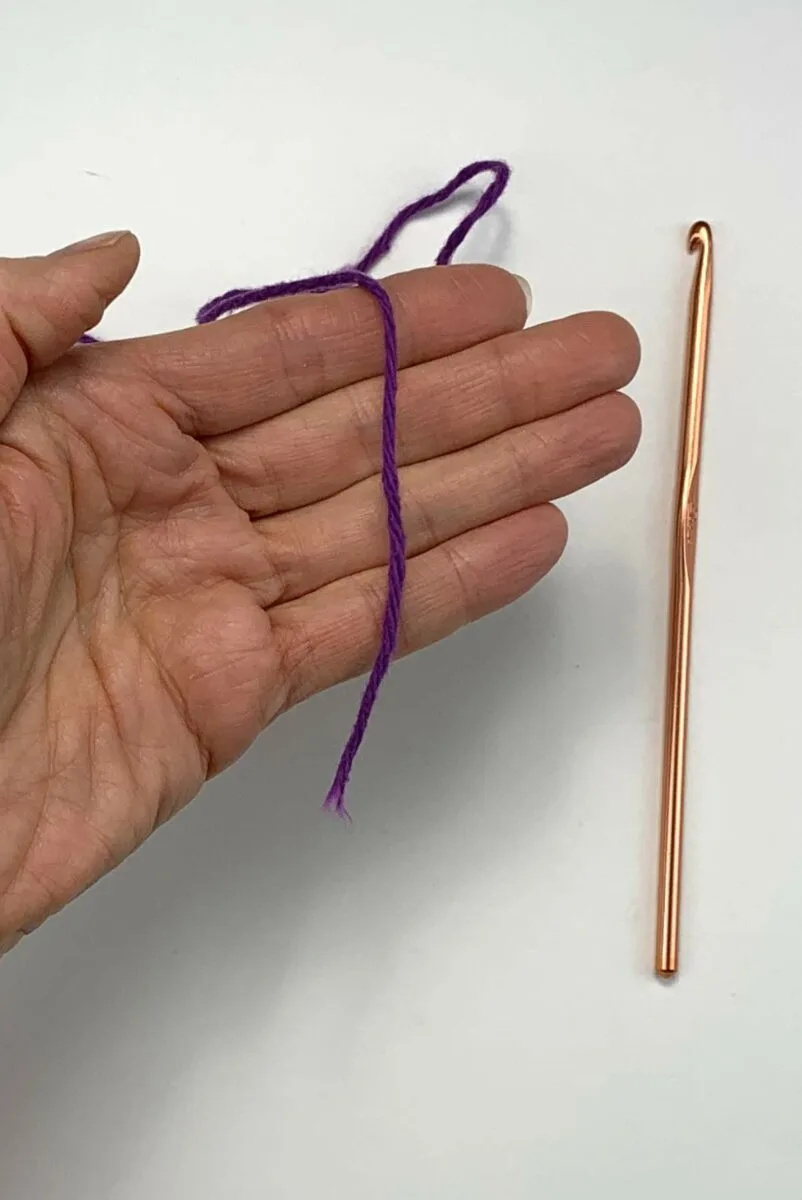
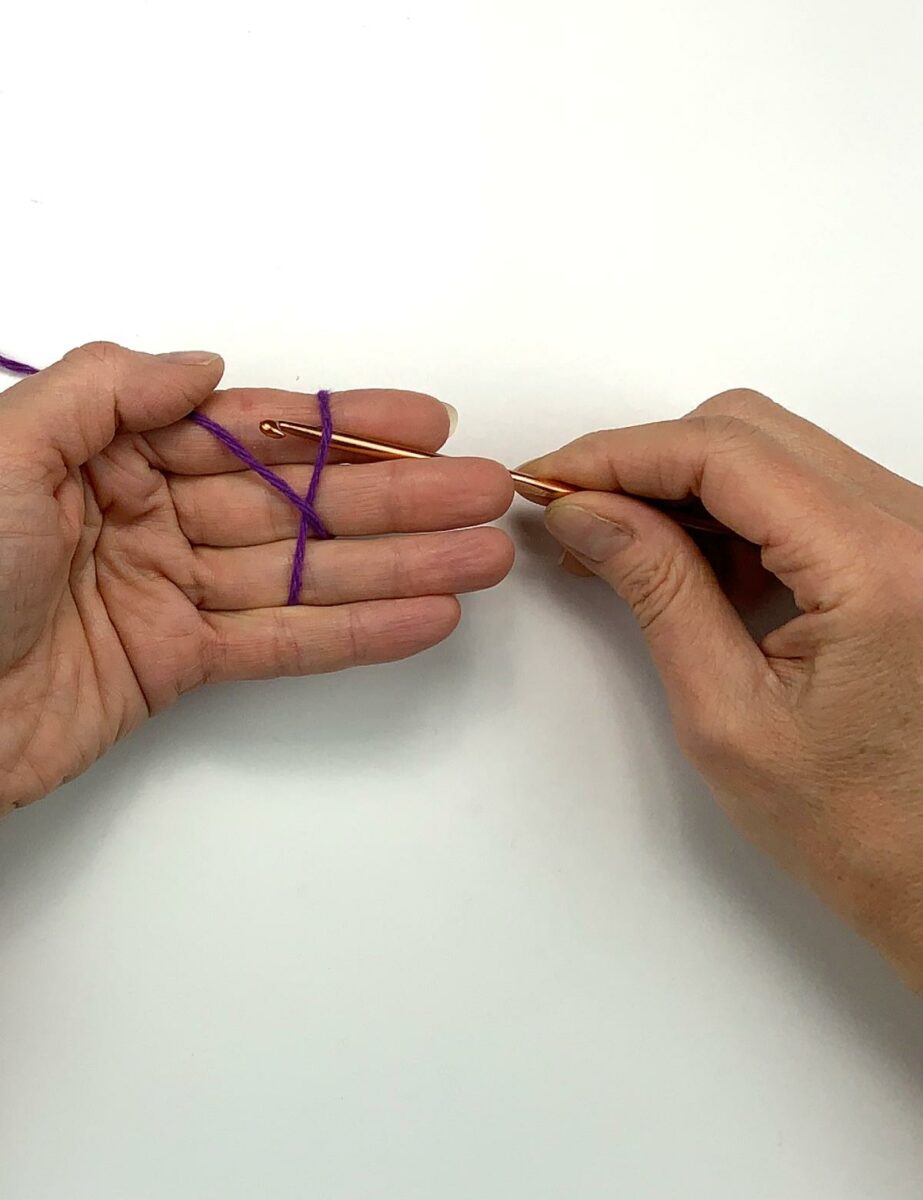
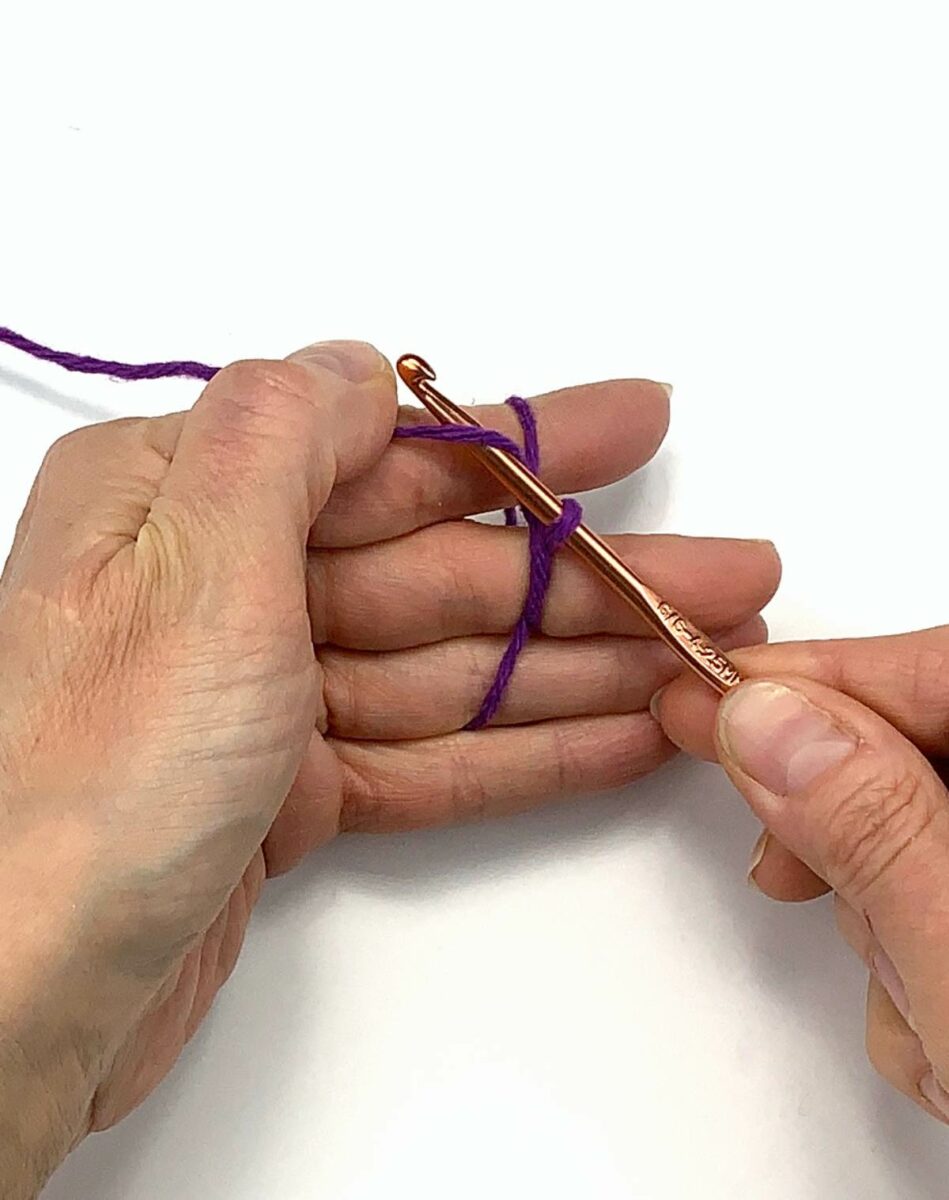
Wrap the Yarn Around Your Fingers
Next, you will take the working end of your yarn, wind it around the middle two or three fingers of your left hand (right hand for lefties) and tuck the cut end under the pinky.
Hold the working yarn end with your thumb to keep it in place.


Note: It may be hard to see in the photo above but the working end of the yarn is lying underneath the cut end which is tucked under the pinkie.
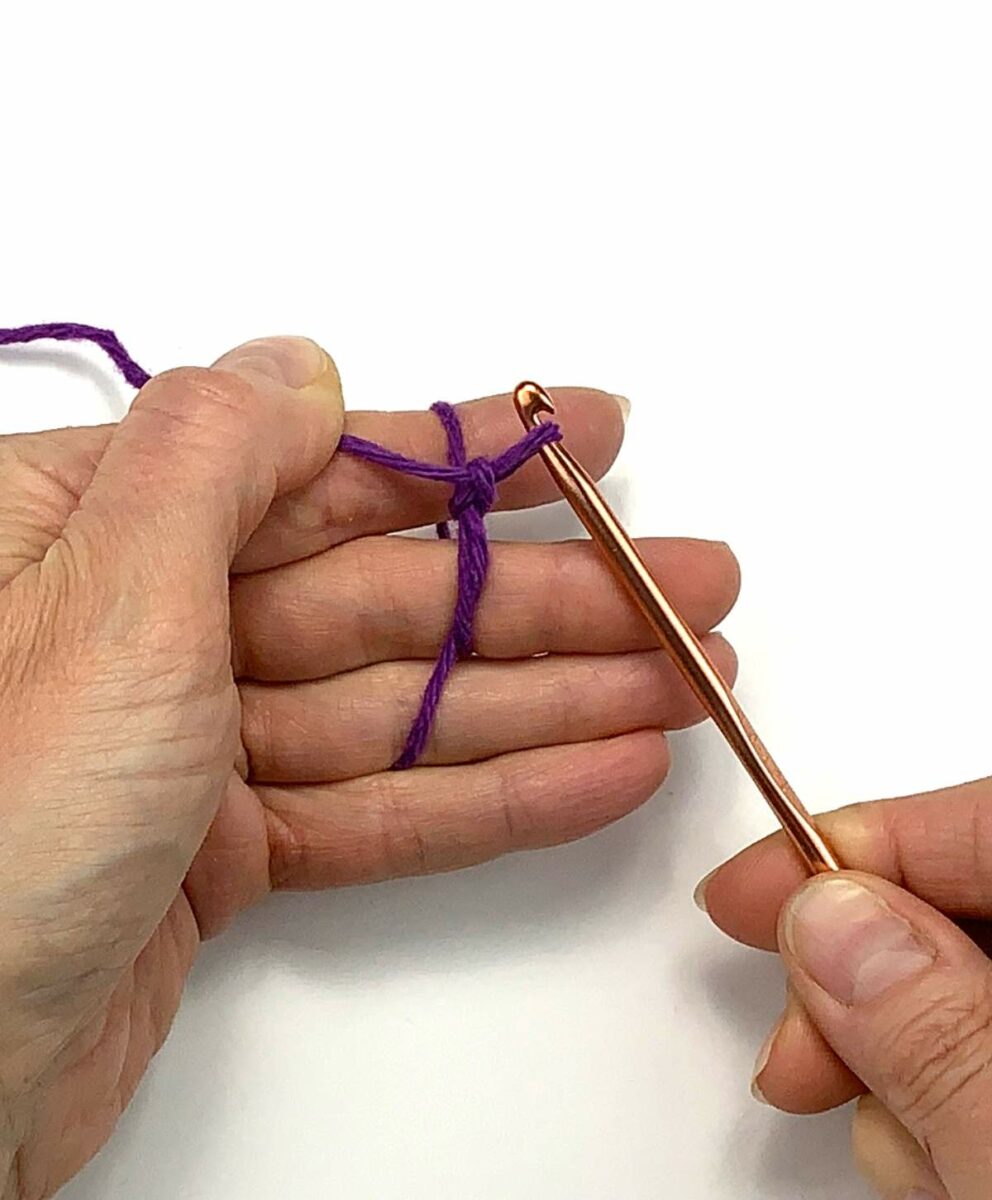
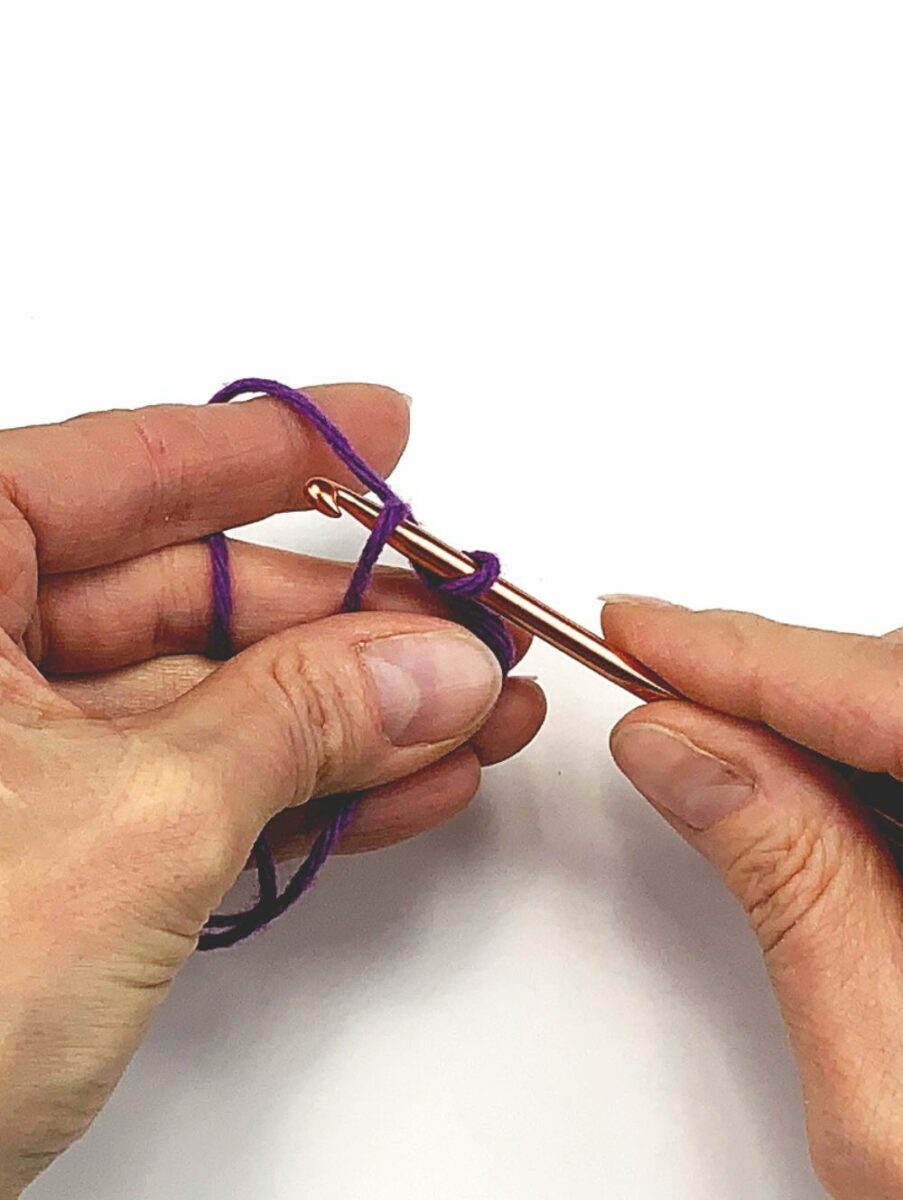
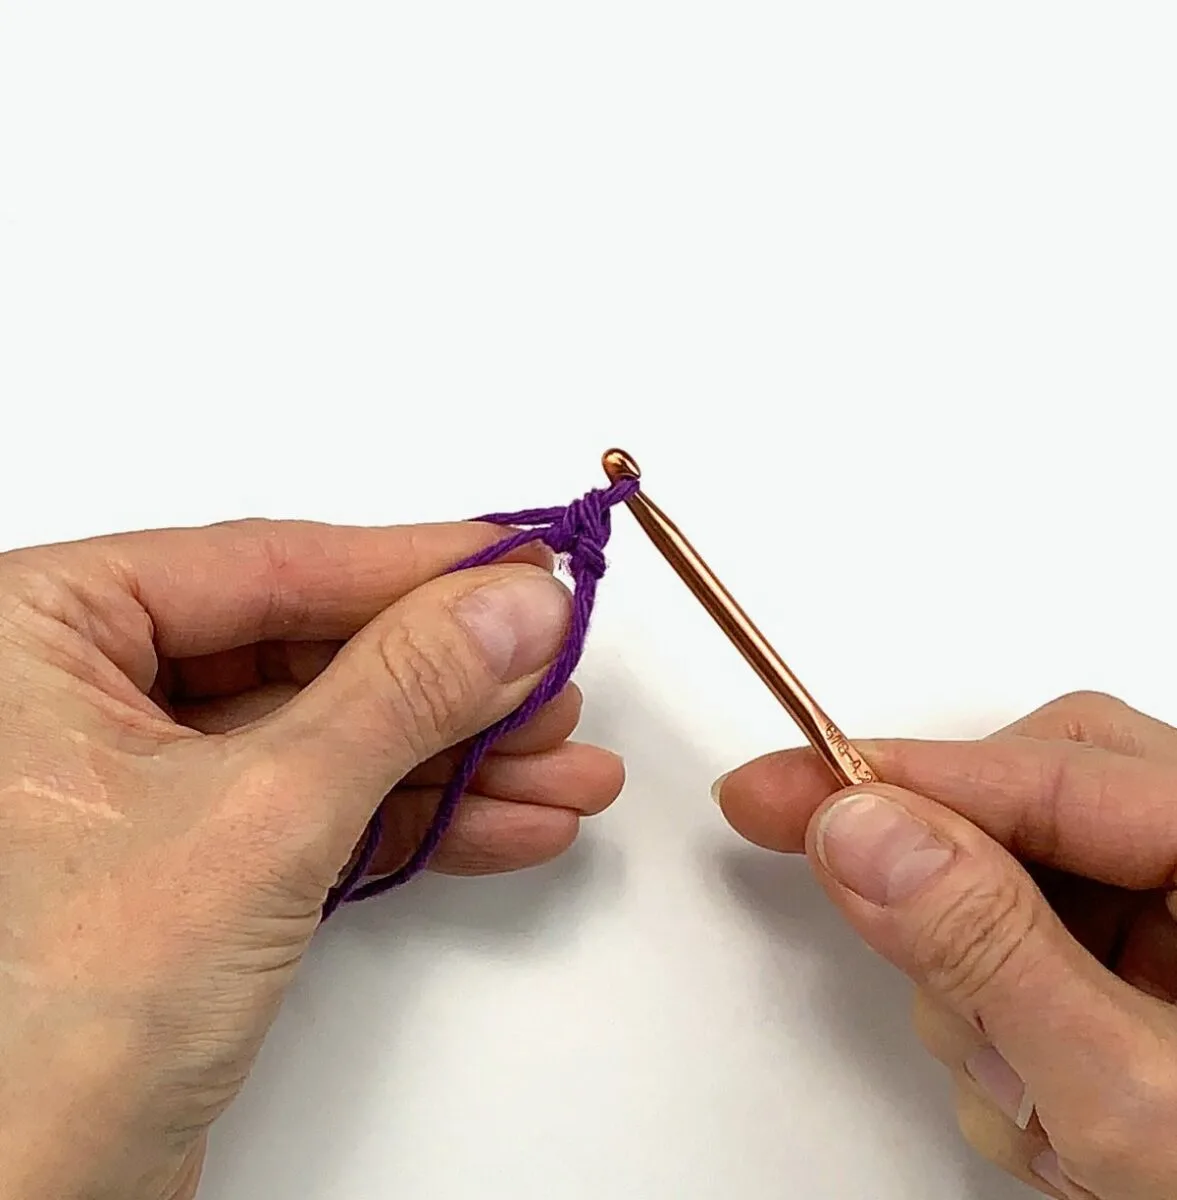
Make a Slip Knot
Now, take the crochet hook and slide it underneath the first strand on the top right (cut end) and grab the working yarn in a Yarn Over. Then, pull the yarn backwards, under the first strand.

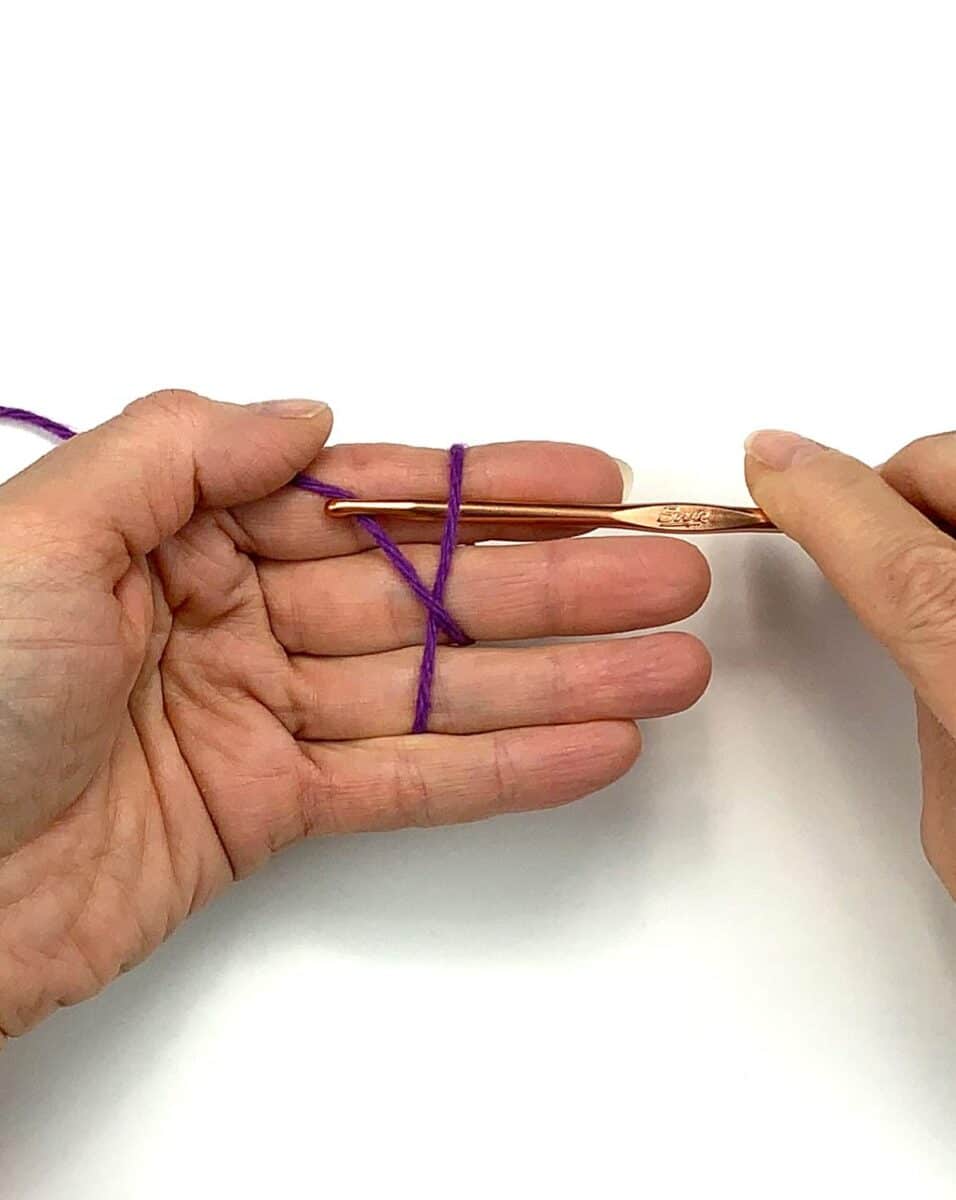


Next you need to turn the hand which is holding the hook toward you, thereby twisting the loop.

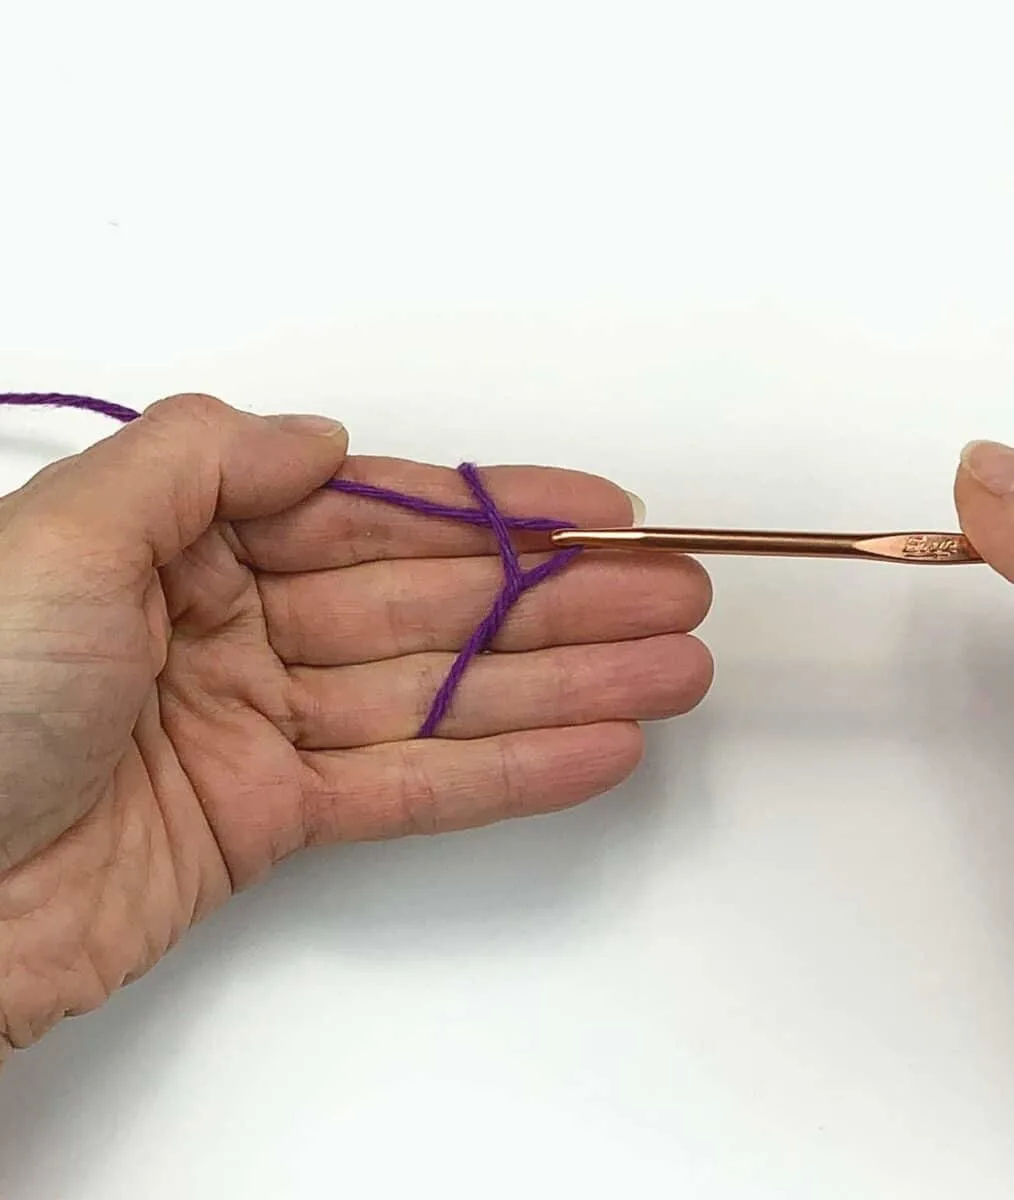
To complete your slip knot, first move the hook over the loop and grab or yarn over the working strand. Now pull this yarn over back through the twisted loop.
Note: It helps to keep the yarn fairly taut against your fingers so it doesn’t move around too much.


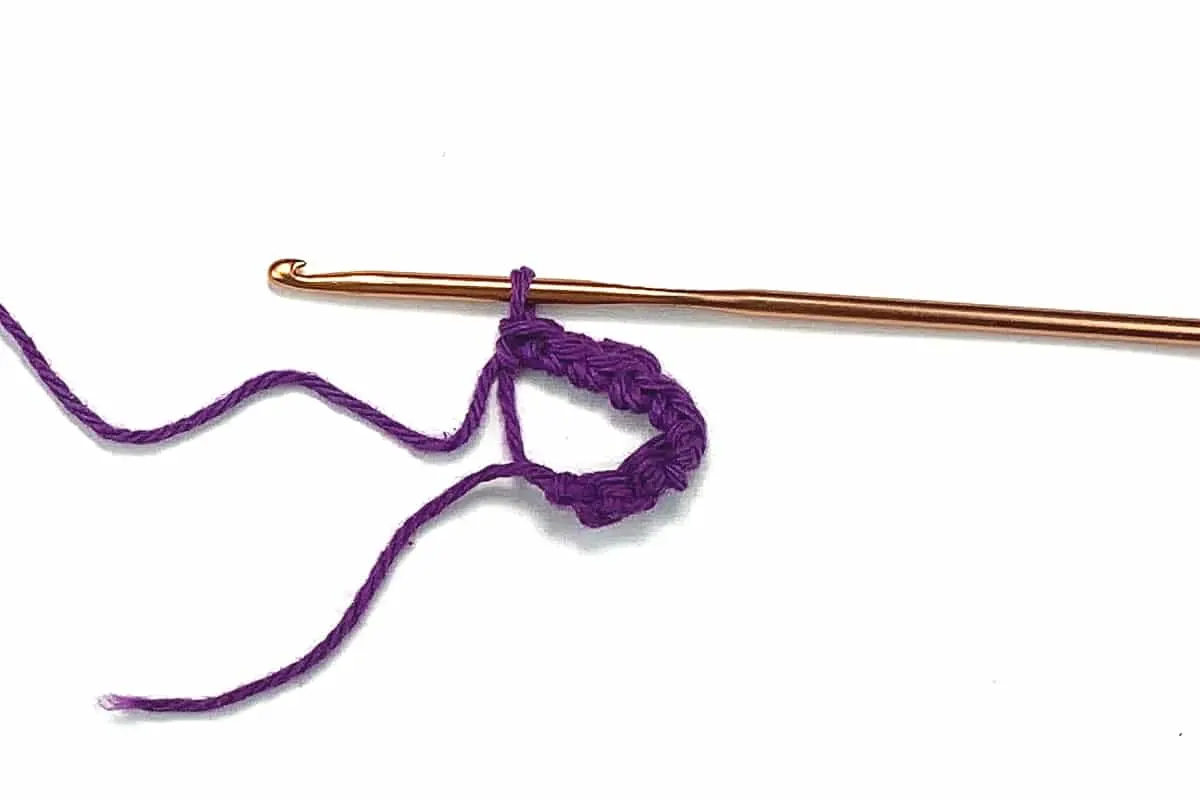
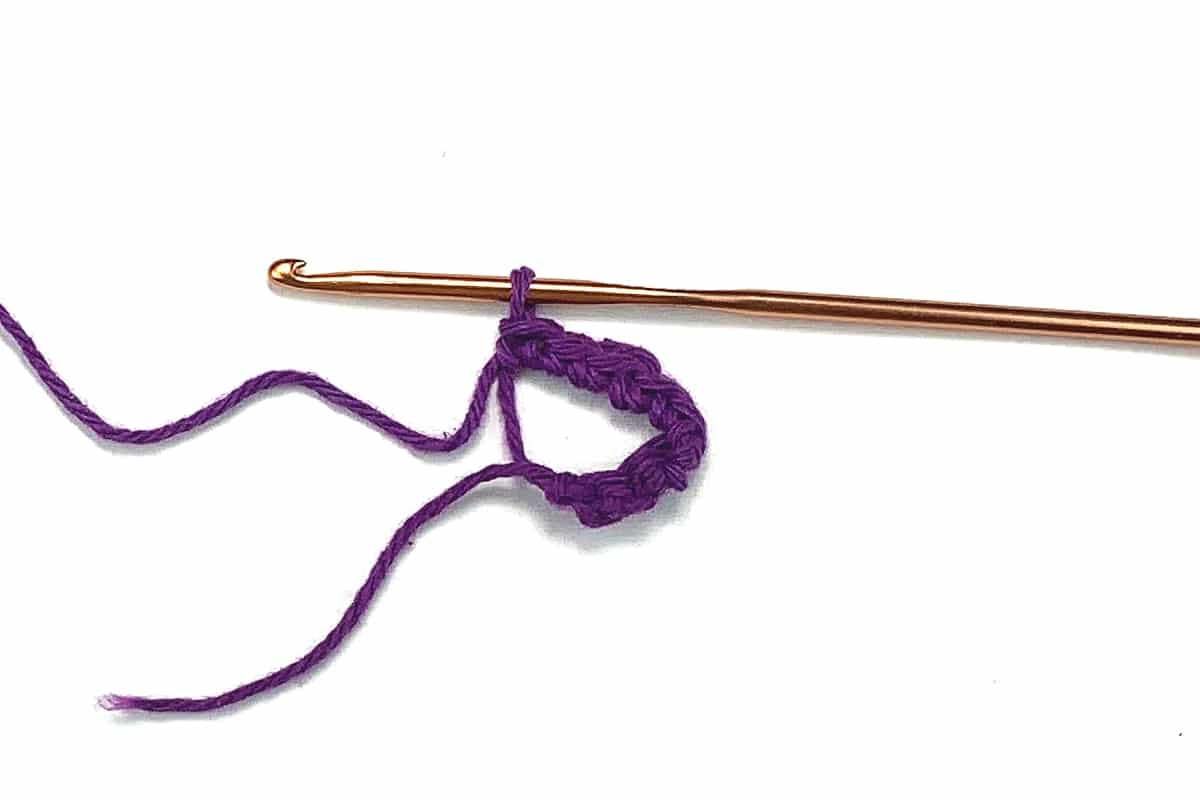
2. Work Single Crochets Into the Circle
Make a Single Stitch Into the Loop
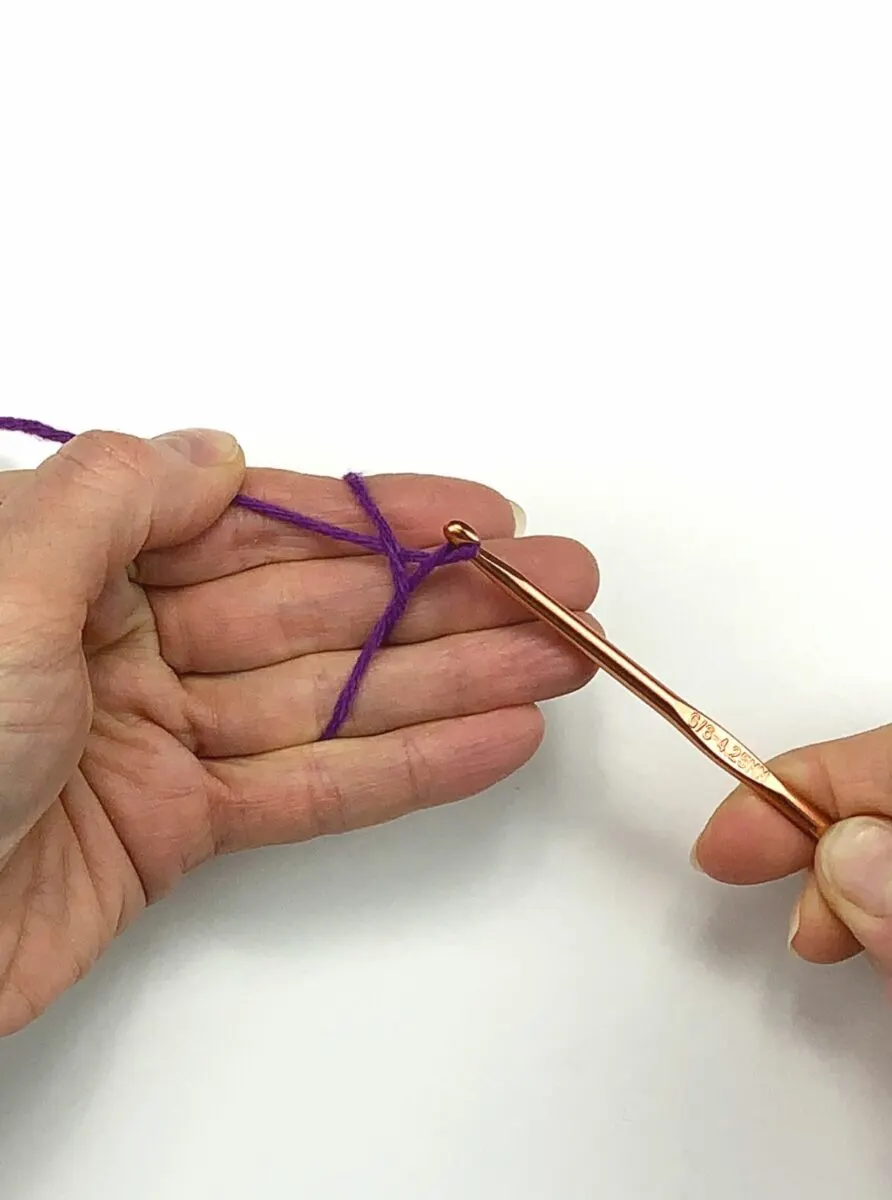
The basic loop is now completed. You will work your first single crochet stitches into the middle of this circle instead of into a row of chain stitches.
Hold the yarn circle as you would normally hold your crocheting with the working yarn looped over your index finger.
To make your first single crochet stitch (sc), put the hook into the circle (from front to back), grab the yarn in a yarn over and pull this back through the circle.
You now have two loops on your hook.

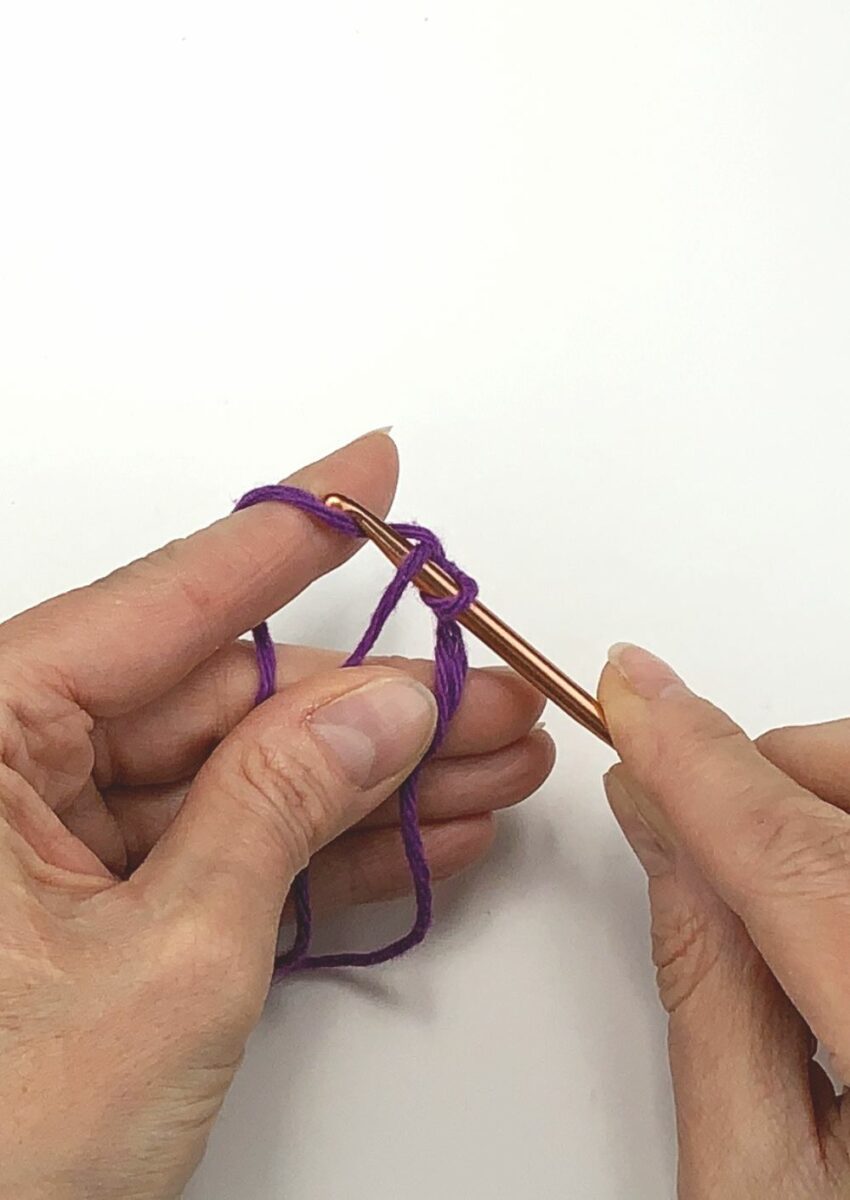

Yarn over again (outside of the circle) and pull this strand through both loops on your crochet hook.
This completes the first single stitch.

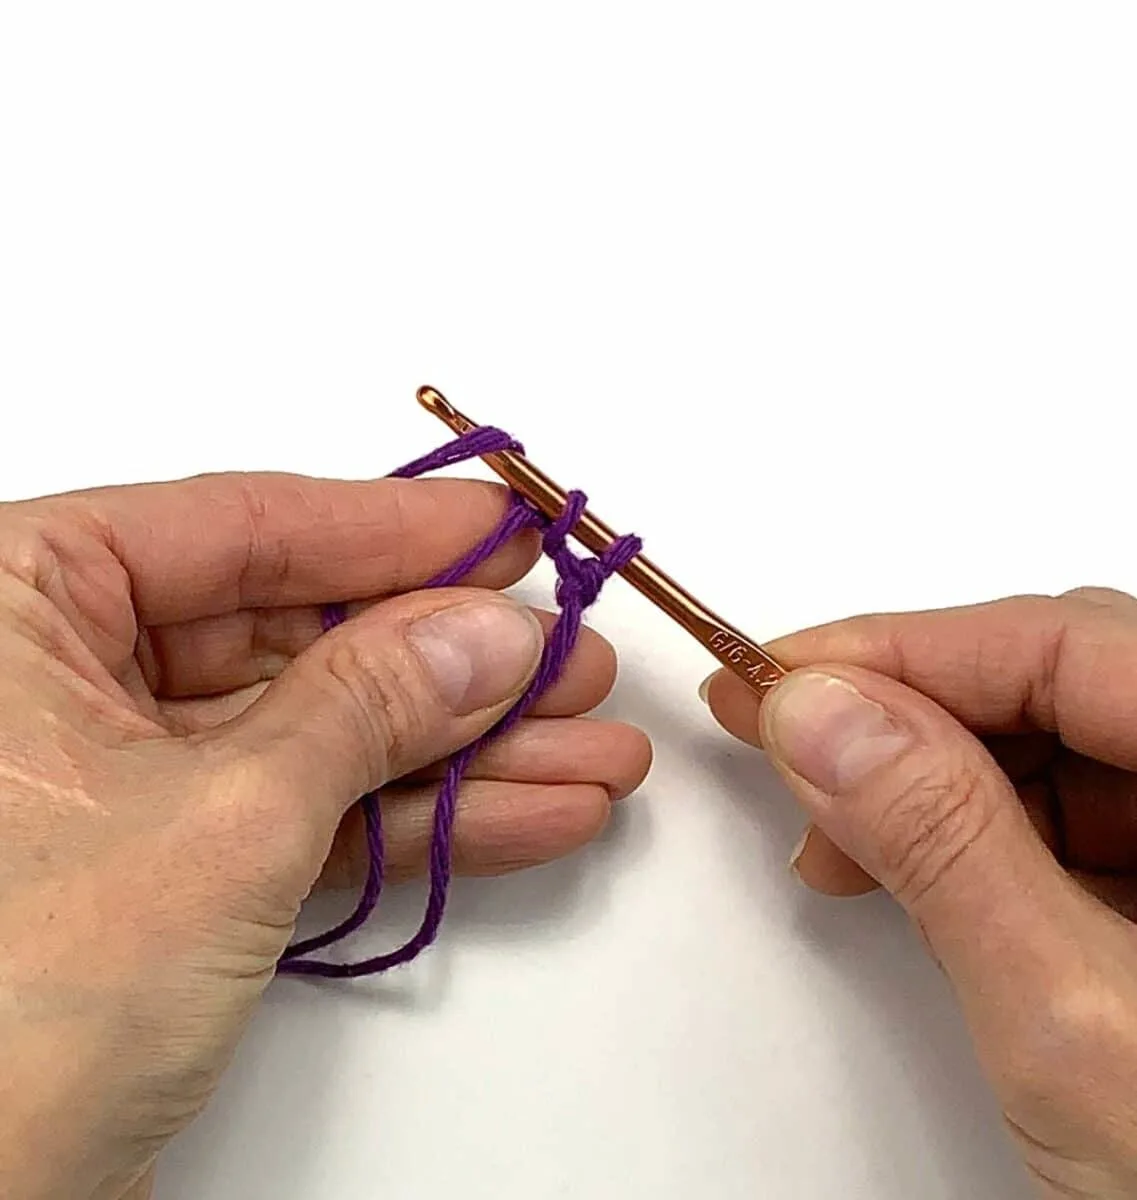
Repeat Making Single Stitches
Continue making singles into the loop according to the step above. How many you need will depend on the instructions in your pattern.
If you are just practicing this technique, six to eight stitches is a pretty good number.

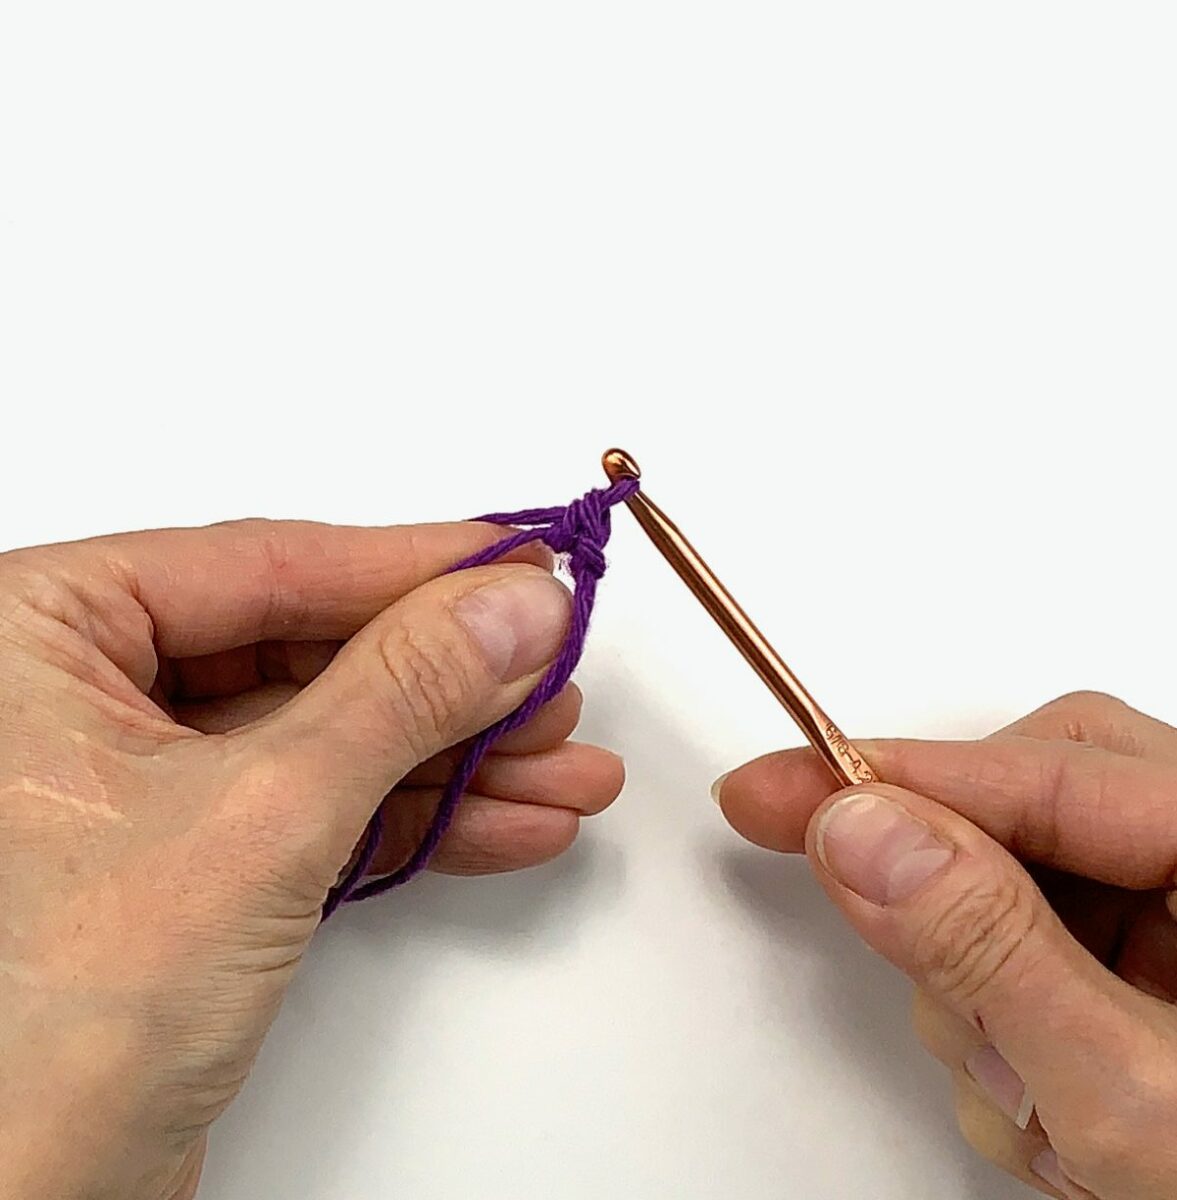
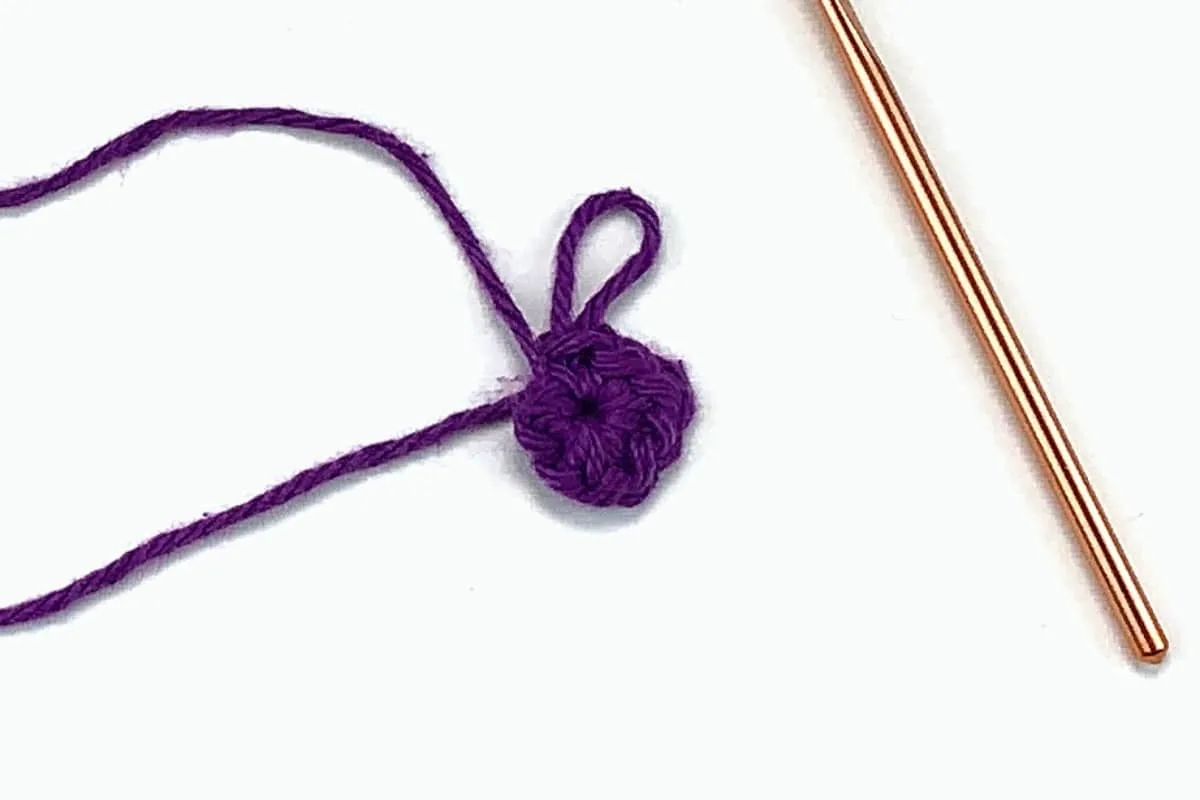
3. Close the Circle
Now that you have worked the required number of stitches, it is time to close up the ring. To do this, hold the ring in one hand and pull the cut end of the yarn to tighten.

How Do You Make a Traditional Crochet Circle?
With the old way of making a ring or circle, you first have to work some basic chain stitches. These are then joined with a slip stitch (careful not to twist the chain). From there, you just have to work a stitch into each chain stitch.

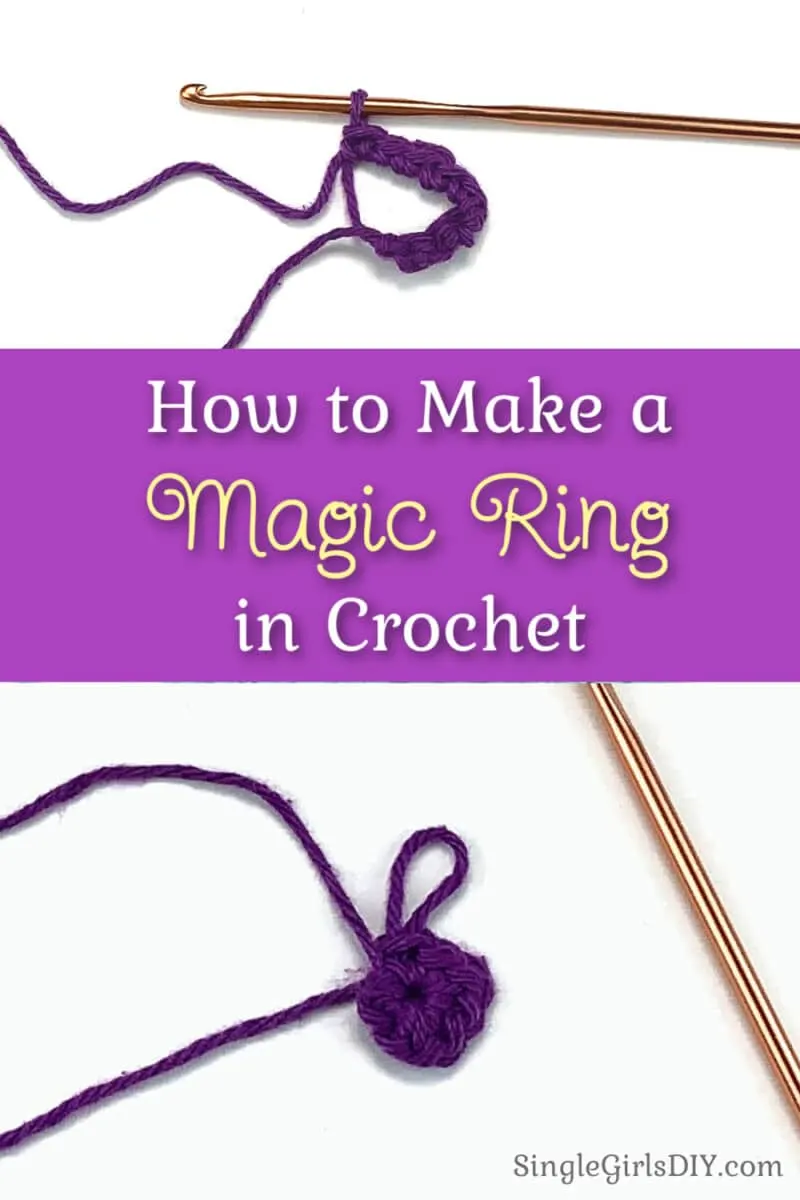
Be sure to Pin This Tutorial for How to Make a Magic Circle in Crochet to save for later!
Related Stitch Tutorials:
- 6 Beginner Crochet Stitches
- Shell Stitch Step by Step
- Easy Waffle Stitch
- How to Make a Puff Stitch
- How to Work the Triple Crochet Stitch (tc or tr)
- Making a Double Crochet (dc)
- Learn the Half Double Crochet Stitch (hdc)
- Front Post Double Crochet Stitch Tutorial
